 |
Have you ever had one of those days when you open your email and find something warm and wonderful. It turns out that I actually inspired someone else to start a blog of her own because she thinks some of my stuff is amazing! So sweet isn't it (especially when I have days where I wonder if anyone is paying attention!) Her name is Kelly and although she's not new to the jewelry scene she is new to polymer clay. You can take a look at her blog here. She created the pieces pictured above using the "Mini" CaBezel mold. You may have seen this tutorial before. It's an old one and pretty basic but it will give you an idea of how Kelly made her pieces. |

My life with polymer clay. Home Of the CaBezels!
Friday, January 18, 2013
A really sweet email
Monday, January 7, 2013
Friday, January 4, 2013
A new way to use the All-In-One molds!!
 |
| For all of the samples above I have used the "Circle" All-In-One CaBezel mold I gently stretched each one differently The centre of the orange one is just a thin piece of clay stretched through the opening to make a hollow cabochon. My new "Groovy" texture stamp was used on the black example. |
 |
| For this example the new "Dragon's breath" texture sheet was used with the "Circle"all-in-one CaBezel mold. After you condition and sheet your clay on the thickest setting, place it on a piece of paper. (You may notice that i have just used a very thin layer of colored clay on top of scrap clay) Place the A-I-O mold on top. With your acrylic roller (held in your fist) press JUST the raised circle portion into the clay. After lifting the mold use a 1 1/8" cookie cutter to cut out the centre. Now use a 2 1/2" cutter to cut around the outside. You can choose to centre it or not. In the image here I have left more clay at the bottom. Now gently stretch the clay to the desired shape. |

Wednesday, December 12, 2012
Two brand new texture sheets!
Introducing my latest texture sheets GROOVY and DRAGON"S BREATH!
Just in time for you to order a little something to put in your stocking ( 'cause we all know that the big guy in red always needs some help.)
Just in time for you to order a little something to put in your stocking ( 'cause we all know that the big guy in red always needs some help.)
.jpg) |
GROOVY
This design goes with all things retro or contemporary.
Use the entire design with a larger project to get the psychedelic feel or
isolate any of its "op art" components in a smaller project.
|
 |
| DRAGON'S BREATH
This design has a free flowing organic feel. Great when
you need something subtle. It starts off small at one end and gradually
increases in size to give you more variety.
|
Monday, December 10, 2012
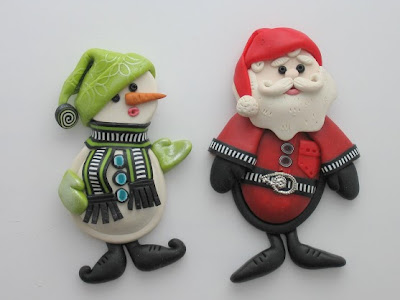
Ho Ho Ho!!! A quick tutorial
It's that time of year again so I just thought I would remind you of this really basic slideshow type tutorial for creating a "Snowman" or a "Santa" with the "Geometric" CaBezel molds. Great for making ornaments or even gift tags. Ho Ho Ho You can find it here.

Sunday, December 9, 2012
Pretty at Christmas
 |
| This piece made with the "Get to the Point" CaBezel mold was made by Janice O'Grady. The chocolate ribbon and copper accent beads make it so feminine, and just in time for the holidays. |
Thursday, December 6, 2012
Leftovers
 |
| No, I'm not talking about food silly! I'm talking about all of those leftover bits from extruding clay. There was a small gathering of them on my table the other day so I decided to lay some down on a piece of scrap clay. Then I used my Lemon-Egg CaBezel mold and made cabochons. Once they were baked, I carved some lines and back-filled them with white clay. (the gold collar is a piece that i picked up at a thrift store) |
 |
| For this example I used an All-In-One mold. "Crest" |
Subscribe to:
Posts (Atom)