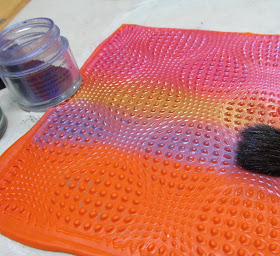
Here is an idea for using the "Groovy" texture sheet.
I used my pasta machine to get a deep impression. Of course if you don't have a pasta machine you can always put the clay on top of a pieca of paper and place it down on the floor with the texture sheet on top and use your foot to get a deep impression. Don't forget to mist the texture sheet with water.
There are 2 colors of clay here. A thin layer of light blue on top of a thick layer of orange. (complimentary colors are a great choice for this)
Once you have conditioned your clays leave the base color on the thickest setting and the top layer on about the 3rd thinnest setting on your PM. Now run the 2 layers together on the thickest setting.
Now, run the clay through your PM on a med-thin setting. Turn the dial back to the thickest setting and run the clay and the "groovy" texture through. The clay will probably curl as it comes through, so make little slits on the long sides to make the clay lay flat again.
Using a soft paintbrush with Pearlex powders and maybe even Guilder's paste, start tracing around the outside edge of circles with a mid-tone color, then, use a darker color between the large circles and then apply a very light color (i've used yellow here) to the centre of the circles. What were doing here is playing up the "op art" illusion.
Now for the fun part. The clay must be stuck down to your work surface before you begin.
Using your sharpest and thinnest flexible blade start shaving off the top surface a little bit at a time to reveal the orange layer of clay below. The use of complimentary colors also helps with the "op art" illusion. The shaving may take awhile because you don't want to go too deep. I obviously need to practice a bit more!!!
All of my texture sheets are available here.


